⬅ Support Hub
APN Walkthrough
How the APN Engine Works
Step 1
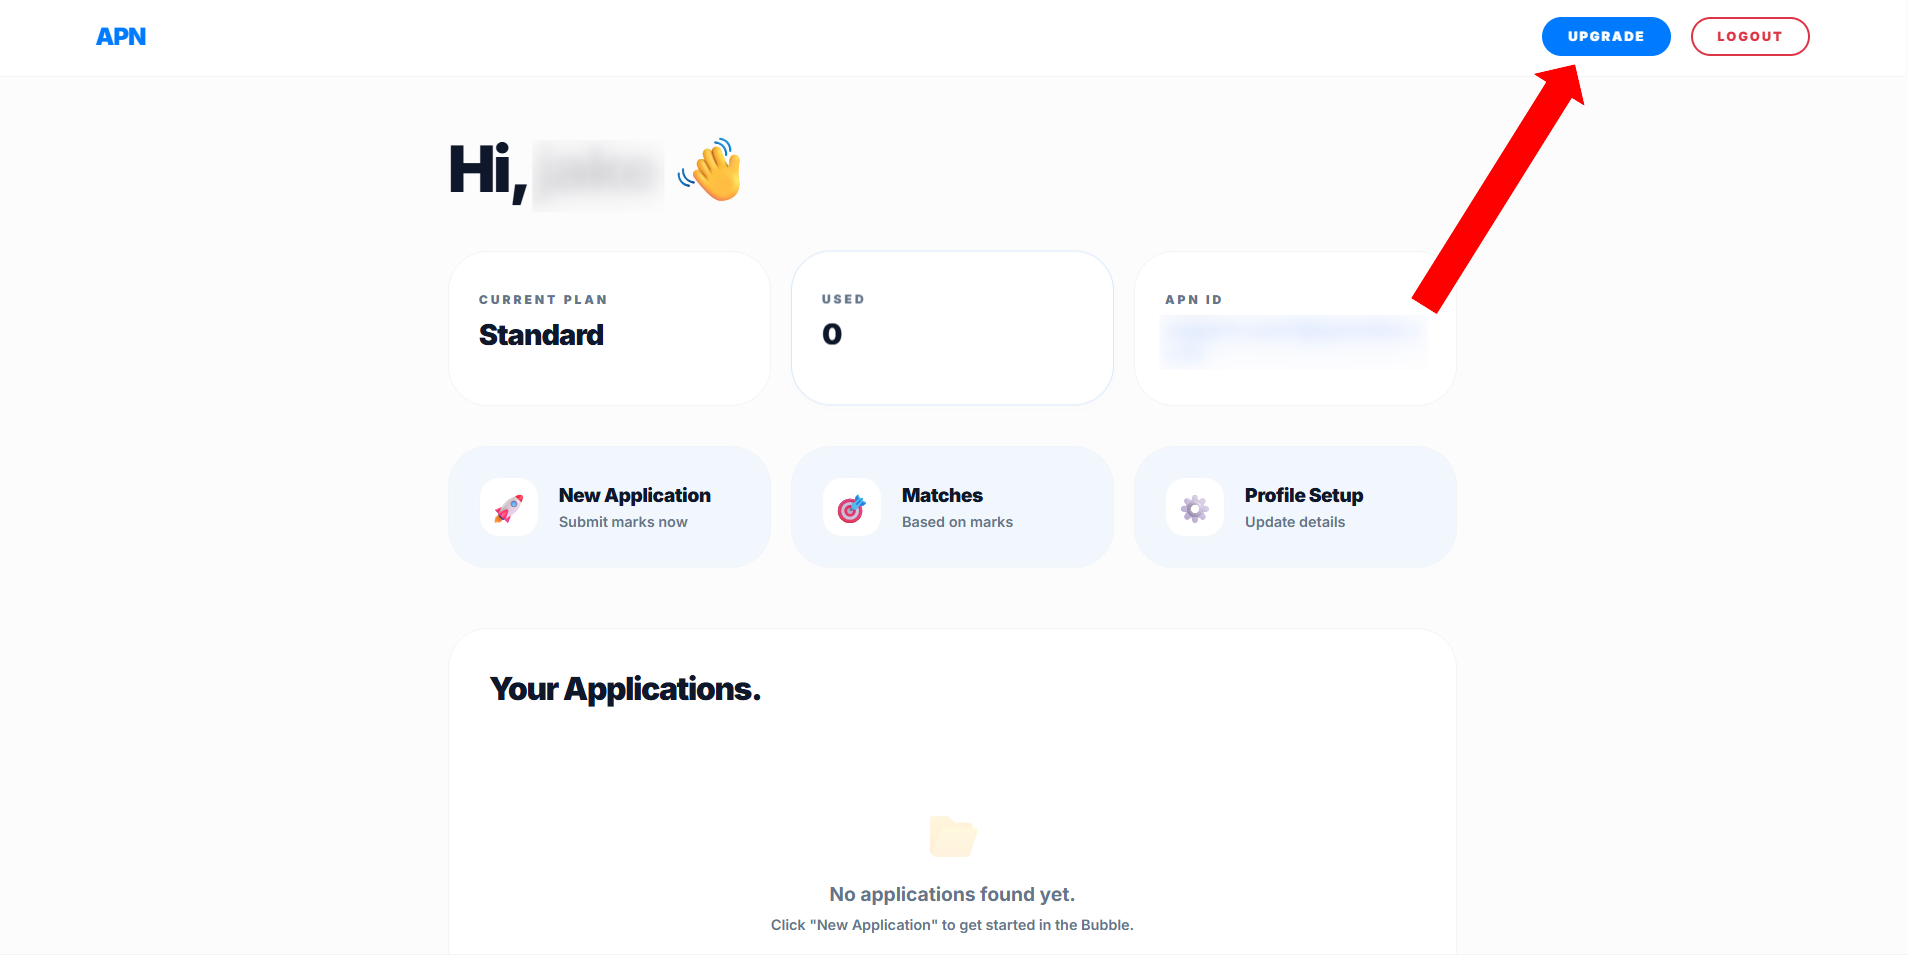
Trigger the Upgrade
From your main dashboard, look for the Upgrade button. Click this to begin unlocking your account and gaining access to the APN application engine.
Step 2
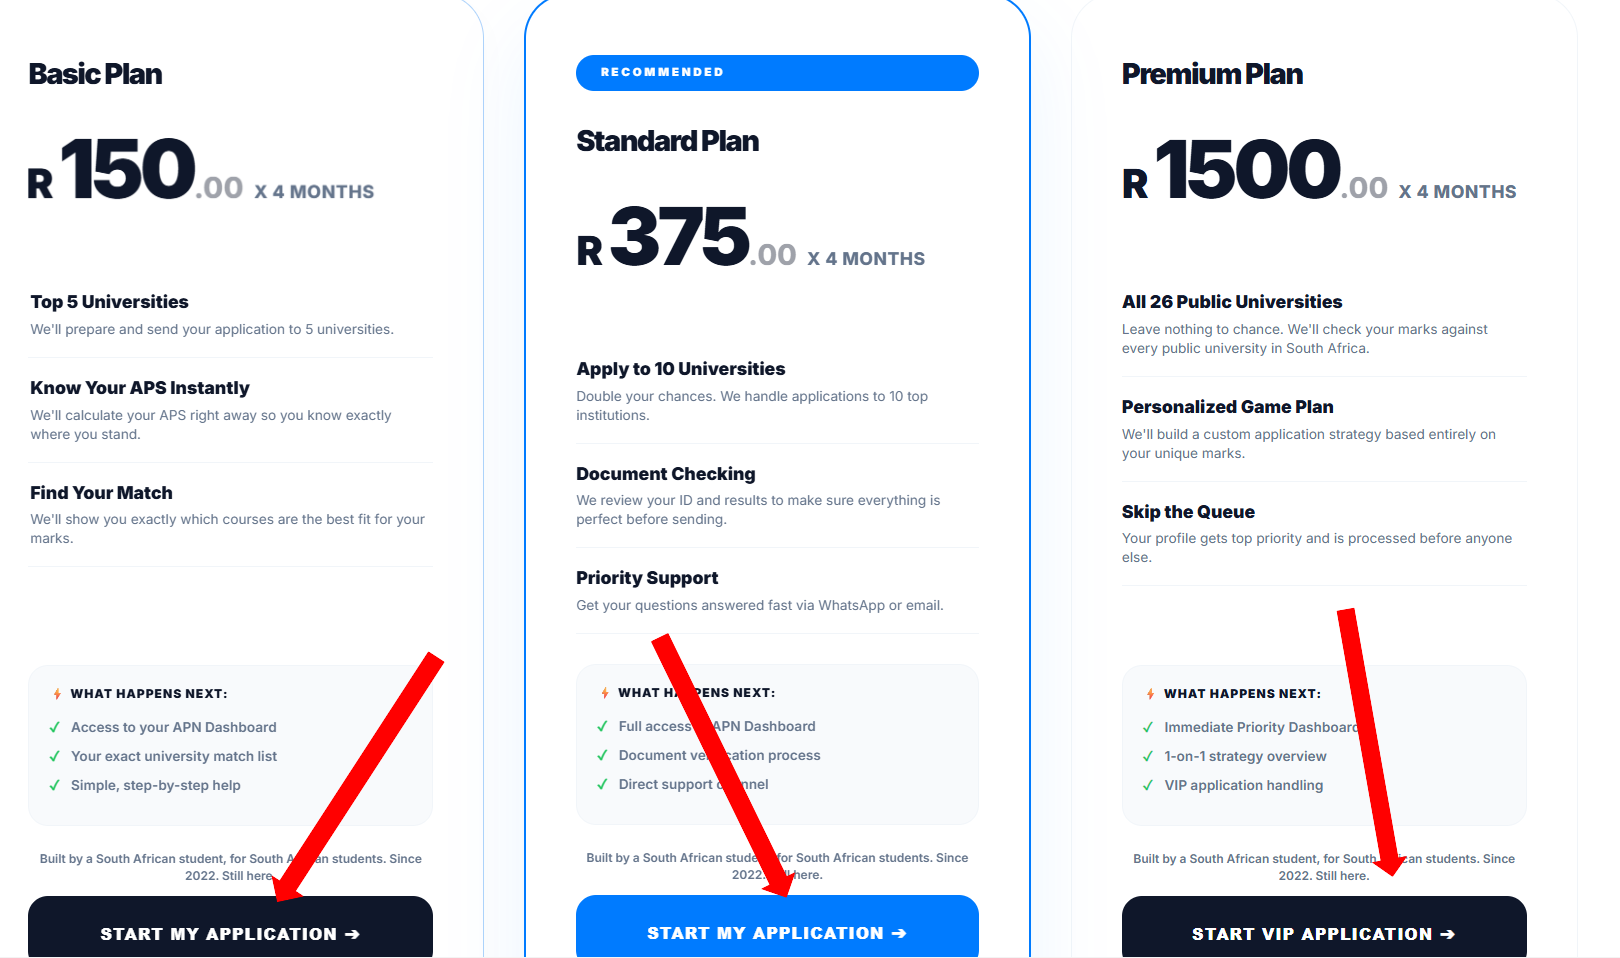
Select Your Plan & Terms
On the pricing page, scroll down and pick your billing structure—you can choose a manageable 4-month split or a one-time payment. Then, select one of the three available application plans that fits your goals.
Step 3
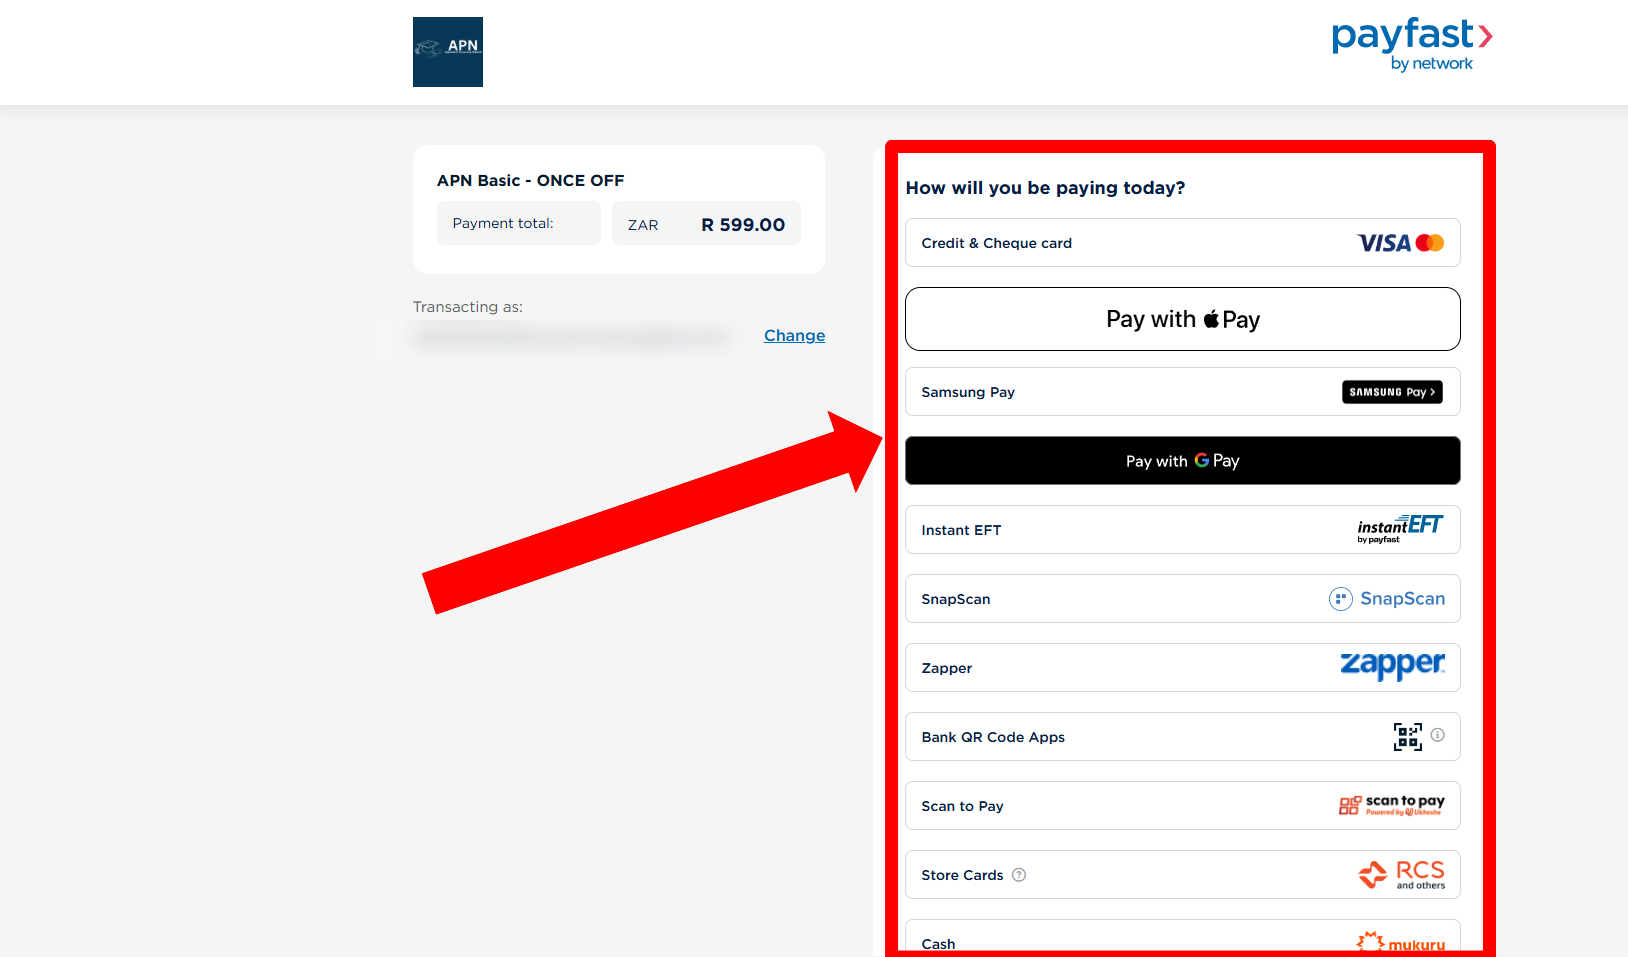
Secure Checkout
Move to the checkout screen to choose your payment method and enter your card details securely. Once processed, you will receive an Approved Statement, meaning your account is officially unlocked!
Step 4
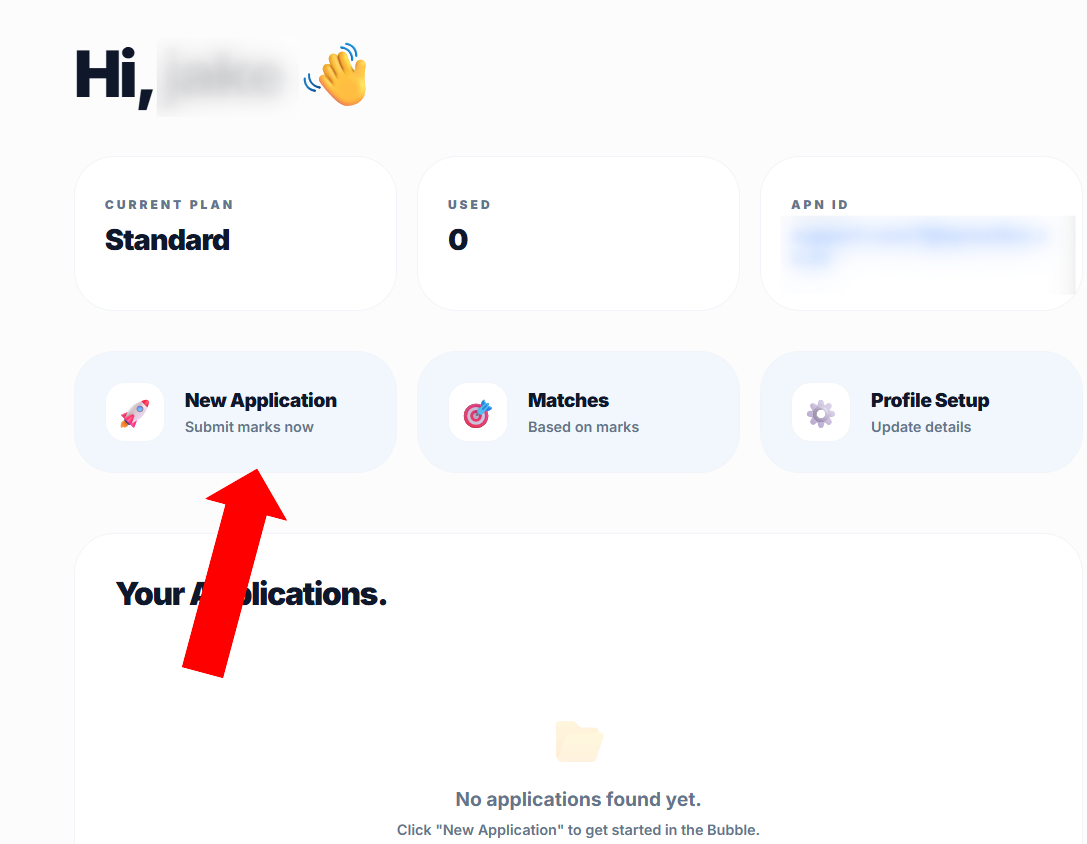
Choose Your Pathway
Now the real work begins. Navigate to the Apply section. Click on Standard, then select University, and finally click on Public to open your application profile.
Step 5
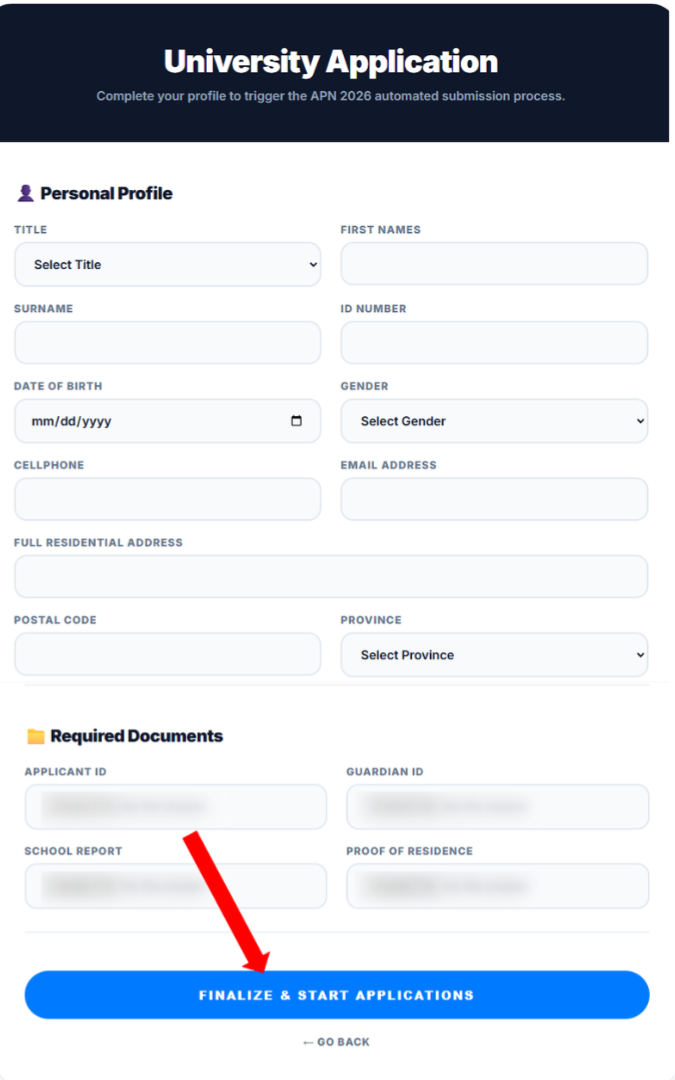
Complete the Master Form
You will be presented with a comprehensive data form. Fill out all of your academic and personal details carefully. Once everything is entered, click Agreed at the bottom.
Step 6
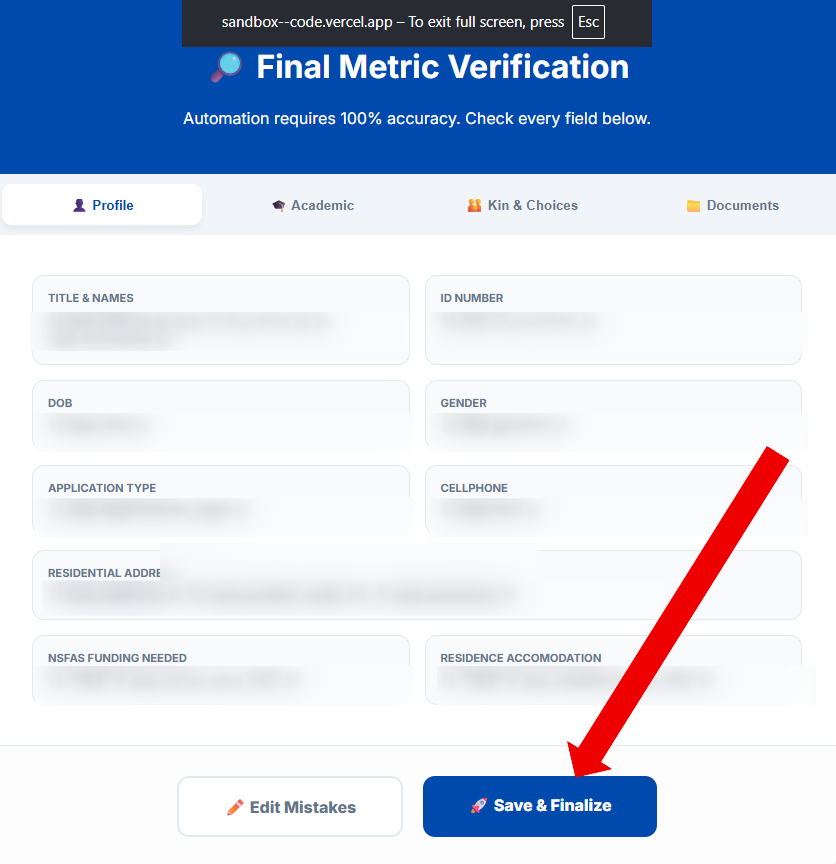
Review & Recap
The system will generate a full recap of your form. This is your chance to spot any mistakes before submission. Review your data, ensure everything is correct, and click Yes to lock it in.
Step 7
Pulse & Recommendations
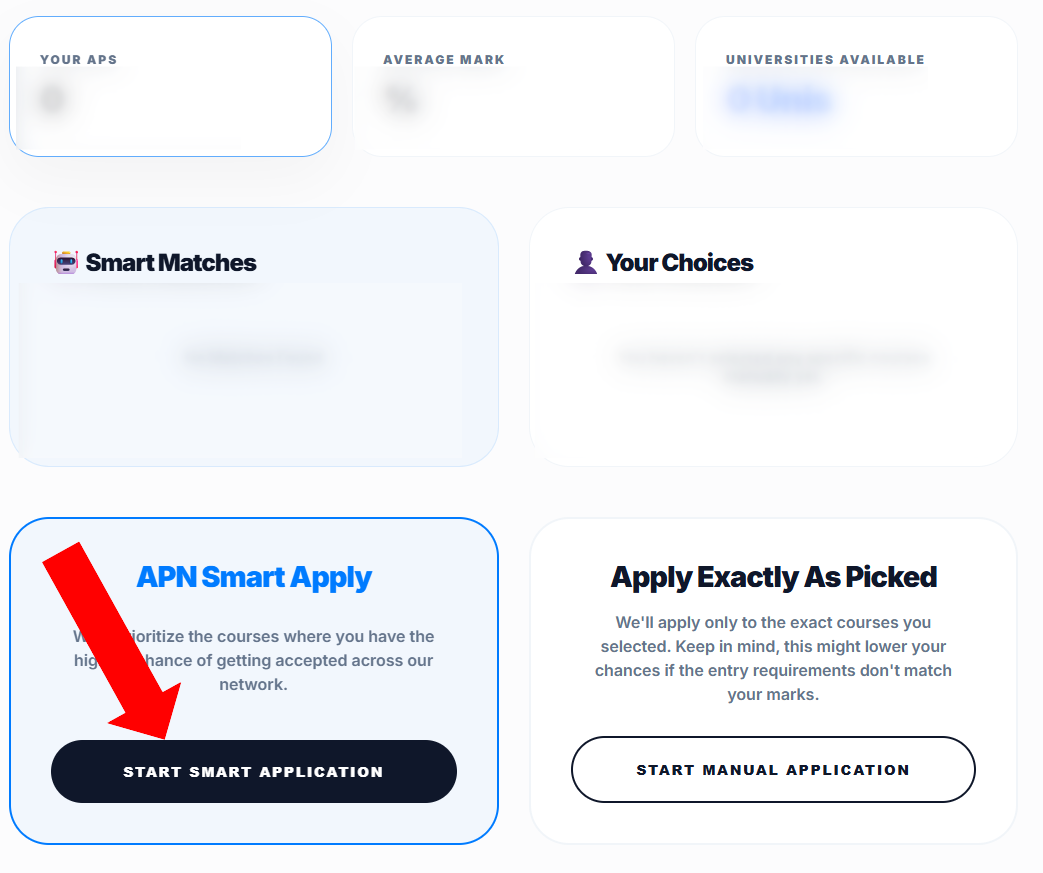
Head over to the Recommendations tab. Based on the time of year, Pulse will analyze your profile and suggest the best courses for you (Note: Pulse availability varies by month and closes late in the year). You can select our recommended courses or manually input your own.
Step 8
Ignite the APN Bot
With your courses selected and your form perfected, click Start Automation (or Start APN Bot). The engine will now wake up and spread your applications across your selected universities automatically!